Search This Blog

28 Feb 2011

PEN TOOL


This is the most important tool in Photoshop. From my experience its one of the toughest and very precious tool.
It is very Difficult to explain it in words written so i am posting a video from an expert. This video explains the basics of how to use pen tool.


20 Feb 2011

Photoshop Paint Bucket Tool


Paint bucket & gradient tools

The paint bucket tool fills an area of an image based on color similarity. Click anywhere in the image and the paint bucket will fill an area around the pixel you clicked.
The exact area filled is determined by how similar each adjoining pixel is to the pixel you clicked on. You can adjust this setting in the options toolbar by changing the tolerance value (make sure the paint bucket tool is selected first). A low tolerance means only very similar colors will be affected, a high tolerance means more pixels will be affected. The range is 0 (exact color matches only) to 255 (all colors).
Photoshop Paint Bucket Tool Options
The example below shows how a simple gradient is filled with green when the center of the image is clicked. The first fill uses a tolerance of 16, the second uses a tolerance of 64:
Examples
Other settings in the options bar include:
  • Fill: Foreground color (i.e. the currently selected color) or Pattern. If you select pattern, the next drop-menu becomes active and you can choose a pattern to use.
  • Mode: The same "blending modes" found in many other tools, including normal, dissolve, lighten, darken, etc.
  • Opacity: Set lower to make the underlying image partially visible.
  • Anti-alias: Make smoother edges by blending gradually with adjoining pixels.
  • Contiguous: (see below).
  • All layers: When using multiple layers, all layers are used to create the fill (otherwise only the selected layer is used).

Contiguous Fill:

When the contiguous checkbox is selected, only pixels that are connected to the original pixel are filled. The example below shows how this works. The image is clicked near the left hand side—first with contiguous on and then with it off:
Example of contiguous fill
Note:
  • You can prevent transparent areas being filled by locking the layer’s transparency Layers palette.
  • The paint bucket tool cannot be used with images in bitmap mode.

Photoshop Eraser Tool


Eraser tool  Photoshop's eraser tool can be found in the second group of icons in the toolbox. It has three variations: Eraser,Background Eraser and Magic Eraser.

The Eraser Tool
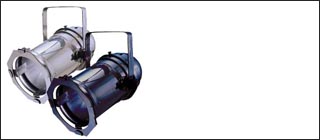
The eraser is basically a brush which erases pixels as you drag it across the image. Pixels are erased to transparency, or the background colour if the layer is locked.
When you select the eraser tool, you have various options available in the toolbar:
Brush: Options include the size of the eraser, hardness of edges and various styles. Brush options are not available in block mode.
Mode: There are three options: brush (soft edges), pencil (hard edges) and block (square brush size).
Opacity: 100% opacity erases pixels completely, 0% does not erase at all. 50% is semi-transparent (or coloured). Opacity is not available in block mode.
Flow: Determines how quickly the erasure is applied by the brush. Lower settings produce a more subtle effect. Only available in brush mode.
Airbrush: Use the eraser as an airbrush. Only available in brush mode.
Erase to History: Erases to a saved state or snapshot of the image. To use this feature, click the left column in the history palette next to the desired state.

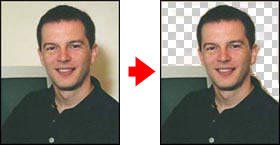
Background Eraser Tool:

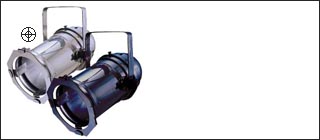
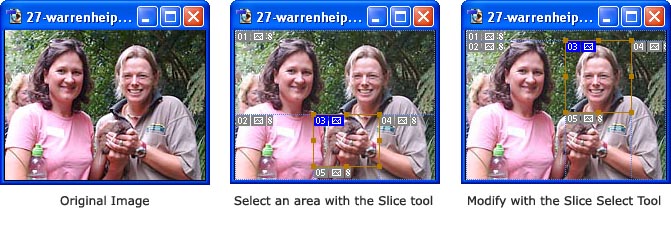
 The background eraser tool allows you to remove the background colour from an image or layer. When you click the image, the eraser samples the colour at the centre of the brush and erases this colour as you drag. Options in the toolbar allow you to specify the type of erasure, colour tolerance and sampling method.
Background Eraser Tool

Magic Eraser Tool:

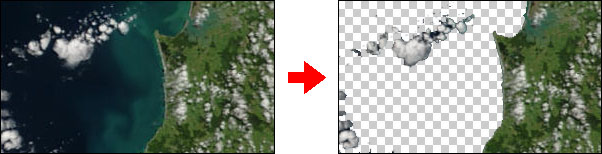
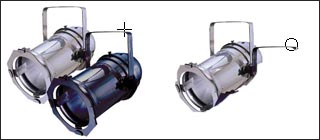
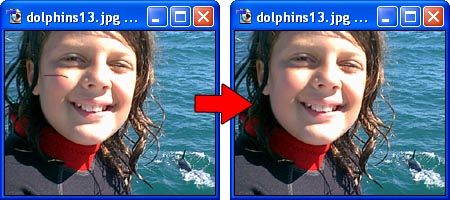
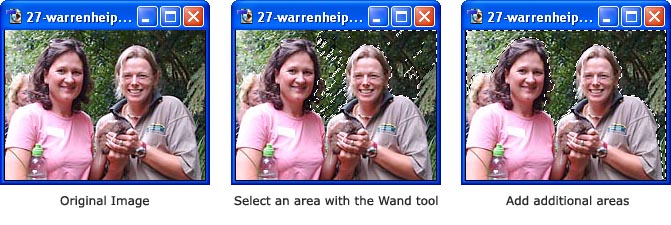
 The magic eraser tool erases all colours within a set tolerance. This is essentially the same as using the magic wand and hitting Delete. Using this tool you don't need to drag — just click once.
Magic Eraser Tool

18 Feb 2011

Photoshop History Brush


 The history brush uses a previous state or snapshot of an image. The tool makes a copy of the image as it was in a previous state, then uses the content of this copy to paint with.

 History Brush Tools
History Palette

Example:

The example on the right shows the history palette of an image. Three things have happened (i.e. there have been three states):
  1. The image was opened.
  2. The levels were adjusted.
  3. A glowing edges filter was applied.
In the left column of this palette there is a selection box next to each state. Click a box to select that state. By default, the selected state is the point where the file was opened or created.
Painting with the history brush tool will add content from the earlier state like so:
Using the History Brush

Photoshop Clone Stamp Tool


Photoshop's clone stamp tool allows you to duplicate part of an image.

The process involves setting a sampling point in the image which will be used as a reference to create a new cloned area.
The Clone and Pattern Stamp Tools
Select the Clone Stamp tool Clone Stamp tool , then check the settings in the options bar. Make sure you have a brush size appropriate for the job. The following settings are fairly typical:
Notes:
  1. Aligned: If this option is selected, the new cloned image will be drawn continuously even if you release the mouse button while drawing. If it is deselected, the clone will begin drawing from the sampling point each time you release the mouse and resume painting.
  2. Use All Layers: If this option is selected, information will be used from all visible layers. Otherwise only the active layer will be used.

Example:

The original image.
Hold down the Alt key — the cursor will change to a target. Click the point you wish to use as a sampling point. This will be used as the reference point for cloning.
Click and draw where you want the cloned image to appear. As you draw, a cross will appear on the original image while a corresponding circle appears where you are drawing.
With a little practice it becomes quite clear how this process works and how to achieve the best results.

17 Feb 2011

Painting Tools: Brush / Pencil


Photoshop provides two tools for drawing (painting) directly to the image: The brush tool and the pencil tool. Both tools work basically the same way — you left-click and drag your mouse in the image to draw. Painting uses the currently selected foreground colour.

The Brush and Pencil Tools

The Brush Tool:

The brush tool paints with smooth edges. The options bar looks like this:
Brush Tool Options Bar
Settings:
  • Brush: The size of the brush.
  • Mode: The blending mode. For most work Normal will be the best option. Experiment with other modes to see what they do.
  • Opacity: Anything less than 100% will allow the underlying image to be seen.
  • Flow: Determines how quickly paint is applied. Lower setting produces lighter strokes.

The Airbrush Tool:

The airbrush option  allows you to apply gradual tones to an image, like a traditional airbrush.

The Pencil Tool:

Pencil Tool Options Bar
The pencil tool behaves much like the brush except that it has hard edges. The pencil tool options are the same as the brush tool, except:
  • There is no airbrush option.
  • There is an Auto Erase option. This paints the background colour over areas containing the foreground colour.

Note: To draw a straight line, click a starting point in the image, then hold down the Shift key and click an ending point.

Photoshop Healing Brush


Healing Brush IconThe Healing Brush tool allows you to fix image imperfections such as scratches, blemishes, etc. By sampling the surrounding area or using a predefined pattern you can blend the imperfections into the rest of the image.
The healing brush tool is located in the Photoshop Toolbox, on the left side.

Using the Healing Brush Tool:

Using the Healing Brush
  • Select the healing brush in the toolbox.
  • Check the settings in the options bar and adjust if necessary. Options include:
    - Brush size
    - Blending mode
    - Source (Sampled from the image or pre-defined pattern)
    - Aligned
  • If you're using sampled mode, Alt-click an area near the imperfection to define the starting point.
  • Click and drag over the imperfection. If aligned is selected, the healing brush will remember the starting point between mouse clicks.

16 Feb 2011

Adobe Photoshop CS5 (2010)Extended Edition


Adobe Photoshop CS5 Extended Edition (2010) | 1.25 GB
System requirements::Intel Pentium 4 or AMD Athlon 64 processor.
:Microsoft Windows XP with Service Pack 3; Windows Vista Home Premium, Business
Enterprise or Ultimate or any Windows 7.
:1GB of RAM.
:1GB of available hard-disk space for installation.
:1024x768 display (1280x800 recommended) with qualified hardware-accelerated
OpenGL graphics card, 16-bit color, and 256MB of VRAM
:Some GPU-accelerated features require graphics support for Shader Model 3.0 and
OpenGL 2.0
:QuickTime 7.6.2 software required for multimedia features

Adobe Photoshop CS5 Extended Edition contains:Adobe Photoshop CS5 Extended | Adobe Air
Adobe Device Central CS5 | Adobe Media Player
Adobe Extended Script Toolkit CS5 | Adobe Extension Manager CS5
Adobe Fonts CS5 | Adobe Bridge CS5

IMPORTANT
Some users could not get the serials to work:1330-1548-9682-5953-9309-6924
1330-1034-6108-6307-6472-1237
1330-1293-5291-0002-3138-2830
1330-1640-2219-9370-8845-3827
1330-1803-8387-7367-5435-5840
1330-1437-3903-9723-0201-9564
1330-1770-1405-7229-2996-9124


all the serials do work but if for some reason CS5 wont accept the serial then use the above or install as a trial then enter the serial on the first launch of CS5 and the serial will be accepted.
X64 users skip the copy dll file steps in this torrent and use the 64bit dll from the tool kit torrent linked further down the description.
If after updating you get licence errors then simply recopy the dll files and that should fix things, also check the tool kit link regularly for updates to the hosts file 


Download:
Code:
http://hotfile.com/dl/103764476/48e1e95/Photshp-CS-5-SuperMagic.part1.rar.html
http://hotfile.com/dl/103764415/f9c3893/Photshp-CS-5-SuperMagic.part2.rar.html
http://hotfile.com/dl/103761383/087f3ff/Photshp-CS-5-SuperMagic.part3.rar.html
http://hotfile.com/dl/103761759/b31d27d/Photshp-CS-5-SuperMagic.part4.rar.html
http://hotfile.com/dl/103762011/3824b6a/Photshp-CS-5-SuperMagic.part5.rar.html
http://hotfile.com/dl/103762564/c024d20/Photshp-CS-5-SuperMagic.part6.rar.html
http://hotfile.com/dl/103763370/eb1c161/Photshp-CS-5-SuperMagic.part7.rar.html
http://hotfile.com/dl/103763604/a13db8a/Photshp-CS-5-SuperMagic.part8.rar.html

15 Feb 2011

Photoshop Slice Tool


Photoshop Slice ToolSlice IconThe Slice tool allows you to divide an image into smaller sections which fit together like a jigsaw (but with straight edges). The slice tool is located in the top section of the Photoshop Toolbox.
There are two tools: Slice (which creates the slices) and Slice Select (which enables you to select and modify existing slices).
Sliced images are commonly used for web design work, which sometimes requires images to be broken up in this way.

Using the Slice and Slice Select Tools:

Using the Slice Select Tool
  • Select the slice tool in the toolbox.
  • Click and drag over the area you wish to make into a slice.
  • Release the mouse button - Photoshop automatically creates the necessary number of slices, with the active slice highlighted.
  • Using the slice select tool, you can move and resize slices by dragging inside a slice, or by dragging the handles.
Note:
  • To export the separate images, choose File > Save for Web from the Photoshop menu. When you save the file you will have the option to save the images and/or a new HTML page to contain the images.

Photoshop Crop Tool


Photoshop Crop ToolThe Crop tool allows you to select an area of an image and discard everything outside this area. The tool is located third from the top in the Photoshop Toolbox, on the left side.
Although cropping reduces the dimensions of an image, it is not the same as resizing. Whereas resizing reduces or enlarges the entire image and everything in it, cropping does not alter the size of the image content at all.

Using the Crop Tool:

Using the Crop Tool
  • Select the crop tool in the toolbox.
  • Select an area of the image to retain (just the same as making a normal selection).
  • When you release the mouse button, the area to be retained is highlighted. This is what the new image will look like.
  • You can move or transform the crop area by dragging the selection or the selection handles.
  • Hit your Enter key to perform the crop.
The result of the example above looks like this:Cropped Photo
Notes:
  • You can combine cropping and resizing in the same operation, using the options in the options bar.
  • Instead of using the crop tool, you can use the marquee tool to make a selection, then choose Image > Crop from the Photoshop menu.

Photoshop Magic Wand Tool


Photoshop Magic Wand ToolMagic Wand IconThe Magic Wand tool allows you to select an area of an image based on its colour. The tool is located near the top of the Photoshop Toolbox.
When you click an area in an image with the magic wand, all areas which are a similar colour are selected. You can specify various options to determine the exact selection.

Using the Magic Wand Tool:

Using the Magic Wand Tool
  • Select the magic wand tool in the toolbox.
  • In the options bar, select a Tolerance value (0 to 255). This determines how closely to match colours - higher tolerance means a larger selection.
  • Check Anti-aliased to define a smooth edge to the selection.
  • Check Contiguous to select only areas which are joined together.
  • Check Use All Layers to select areas from all layers.
  • Click the image in an area which you want to select.
Note: You can add and subtract to the selection by using your Shift and Alt keys, or clicking the selection buttons in the options bar.

Photoshop Lasso Tools


Photoshop Lasso ToolsThe lasso tools allow you to select precise areas of an image by drawing or tracing the selection outline. There are three lasso tools available:

Lasso Tool:

This is a freehand selection tool. Click and hold your left mouse button on the image and draw your selection.

Polygonal Lasso Tool:

Similar to the lasso tool, except that instead of holding your mouse button down to draw, left-click on various points to create a selection with a series of straight edges.
You can also hold down the Alt key (Windows) or Option key (Mac OS) to draw freehand sections.

Magnetic Lasso Tool:

This is a very handy tool for selecting areas which have reasonably well-defined edges. Left-click at the starting point of your selection and simply move the mouse along the edge.
"Fastening points" are automatically made at various points along the edges. Left-click at any time to add a fastening point manually.

To Complete a Selection:

To finish drawing a selection, either click on the selection starting point or double-click anywhere.

Photoshop Move Tool


Photoshop Move ToolMove IconThe move tool allows you to move a selection or entire layer by dragging it with your mouse or using your keyboard arrows keys. The move tool is located at the top right of the Photoshop Toolbox.
When the move tool is selected, click and drag anywhere in the image. By default, if an area is selected the selection will be moved, otherwise the whole layer will be moved. See the options bar for more options.
Alternatively, use your arrow keys to move the selection or layer in small increments. Hold down the Shift key to move in larger increments.
Note: You can activate the move tool when another tool is selected by holding down the Ctrl key (Windows) or Command key (Mac OS).

Photoshop Marquee Select Tools


Photoshop Marquee Select ToolsThe marquee tools are selection tools which allow you to select rectangles, ellipses and 1-pixel rows and columns.
The marquee tools are located at the top left of the Photoshop Toolbox. Click and hold your mouse over the marquee tool to see the four options:

Rectangle Marquee:

Make a rectangular selection. Hold the shift key down to constrain the selection to a square.
Note: ImageReady also allows rounded corners in rectangles.

Elliptical Marquee:

Make an elliptical selection. Hold the shift key down to constrain the selection to a circle.

Single Row Marquee:

Make a horizontal selection 1 pixel high.

Single Column Marquee:

Make a vertical selection 1 pixel wide.

Marquee Options:

When you select any marquee tool, related options appear in the Tool Options bar (just below the main menu). This allows you to set the type of selection, feathering, etc. Options are slightly different for each marquee tool.
Photoshop Tool Options

Photoshop Toolbox


The toolbox contains the main tools for working on images. Click any tool to select and use it.

A small arrow next to a tool in the toolbox indicates that the tool also has additional options available. In Photoshop, click and hold your mouse on a tool to see its options. For example, if you click and hold on the select tool, you'll see select options such as eliptical selction, single row selection, etc.
Photoshop Tools

Tool Options:

When you select a tool, additional options appear in the Tool Options bar (by default this is located just below the main menu). The example below shows the tool options bar when the rectangular marquee tool is active.
Photoshop Tool Options

Overview of Adobe Photoshop


Adobe Photoshop is a seriously powerful photo and image editing application. Part of the Adobe suite of productivity software, Photoshop is considered by many to be a benchmark in the world of professional digital image solutions.

Let's have a quick look at what Photoshop is, and what it isn't.

Photoshop is Not a Drawing Program!:

This is a very common source of confusion and frustration. Although it is possible to use Photoshop to design and construct original graphics, you will find that it is difficult and limited. The reason is that Photoshop is not intended to be used for this type of work. Photoshop is an image editing tool, not a design tool. To create original images, Adobe provides other specialist programs such as Adobe Illustrator and Adobe Image Ready.

So What Does Photoshop Do?:

The real power of Photoshop is in working with existing images. Typical tasks include treating and manipulation, compositing, converting to different formats, printing, etc.
Photoshop is very strong in the world of printed media and is popular with newspapers and other publishers.

Compatibility:

Photoshop tends to work well with other applications. As well as integrating seamlessly with other Adobe products (such as Premiere, Illustrator, etc), Photoshop formats are also widely recognised and able to be imported into programs such as Macromedia Fireworks, Corel Draw, etc.

Learning Curve:

Photoshop is so feature-rich that it does take a while to learn all the ins and outs. Don't expect to become proficient overnight. However the interface is well set out and quite intuitive.

Price:

The target market for Photoshop is the professional world, and this is reflected in the price - it is one of the most expensive packages of its type. Cheaper versions are available (such as Photoshop LE) but lose many of the important features.

Competition

Other popular applications in this market include:
  • Paint Shop Pro 
  • Macromedia Fireworks 
  • CorelDRAW 10 
  • Gimp (for Linux)